Using Facebook Leads to Increase Medicare Supplement Sales
A Facebook business page is a powerful tool that can be set up for free in a matter of minutes. With over a billion people using Facebook, you are missing out on a great opportunity to connect with your existing customers as well gaining new prospects.
Some of the benefits of using Facebook ads to get Medicare Supplement leads:
How to get started
Setting up your Facebook business page is easy!
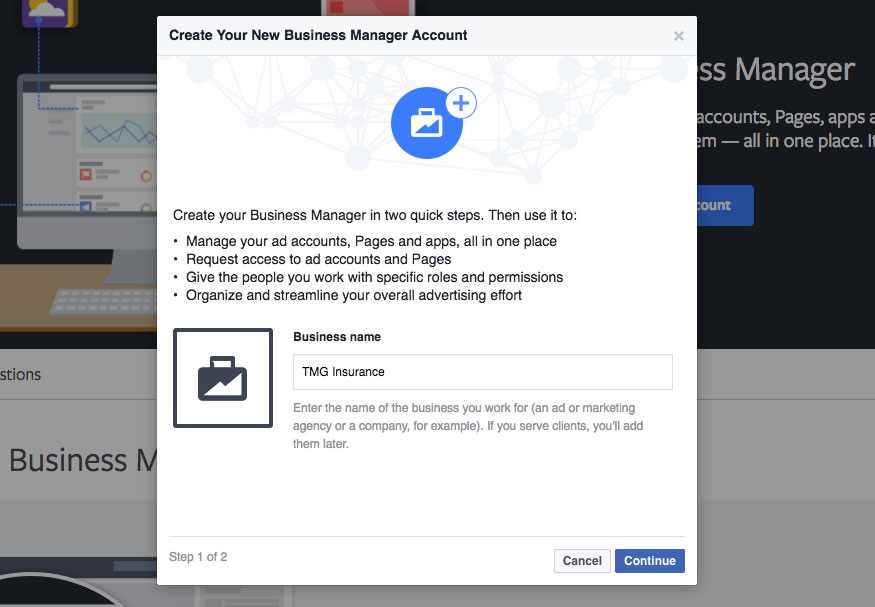
Go to https://www.facebook.com/business/ and click to create an account.
When prompted, type in your business name and create your profile then click “finish.”
Next you will be taken to the Facebook Business Manager page. This is where you can customize your page by adding a profile picture of yourself or your logo and a cover photo.
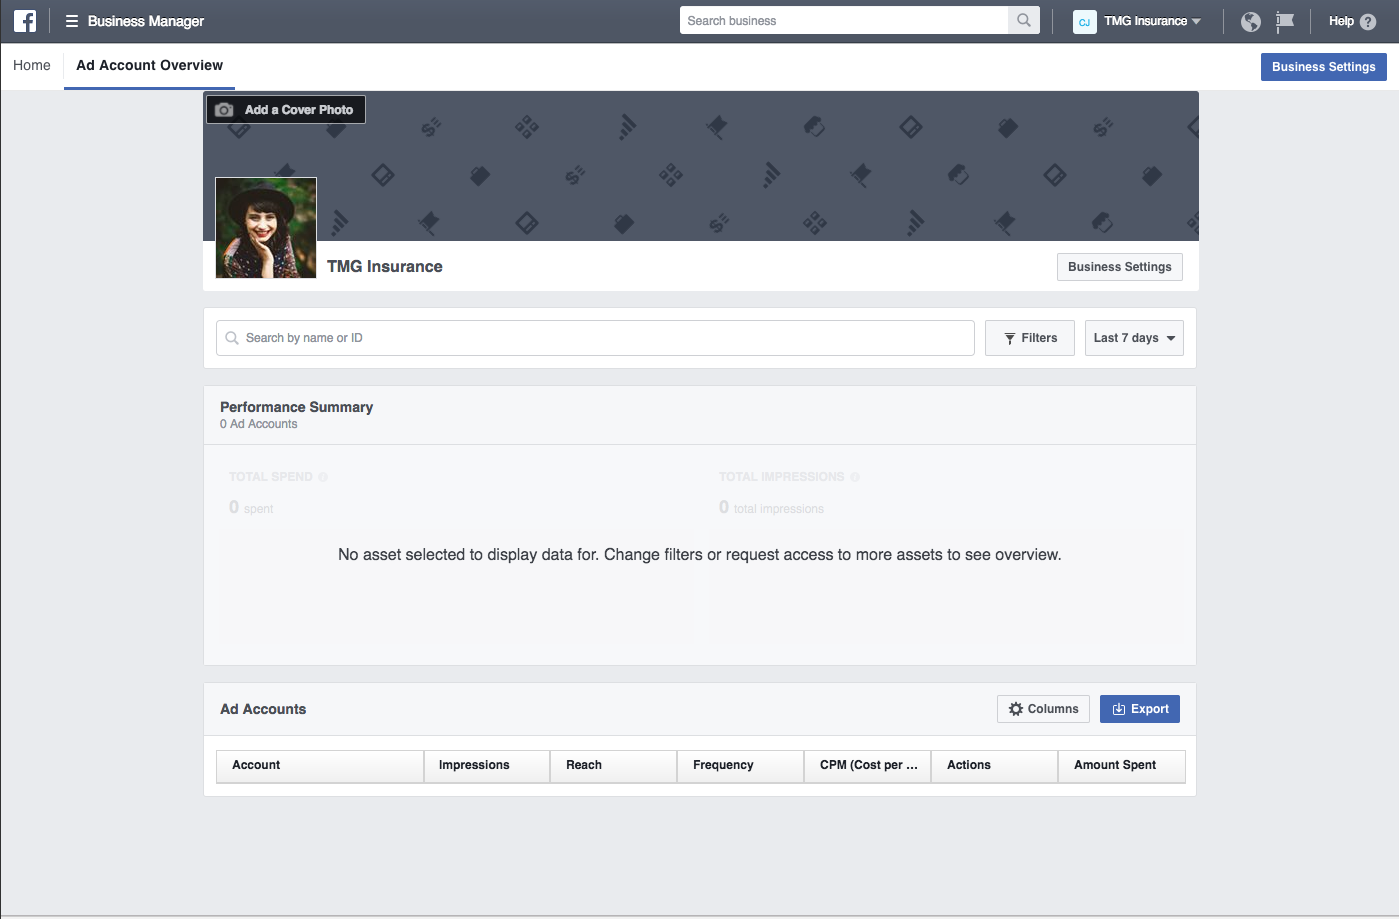
Become familiar with your Facebook Business Page
Business Manager
The business manager is located at the top left of the screen beside the Facebook logo.
Click this prompts a dropdown menu with the following options:

If you don't see all of these options, click All Tools at the bottom of the dropdown. To exit this dropdown menu, click Business Manager again.

Business Settings
Click on Business Settings on the right side of the screen (under the cover photo) to access the tools that the business manager settings has to offer.

Here you can create pages, ad accounts, create projects, edit your business information, update your preferences, and view requests.
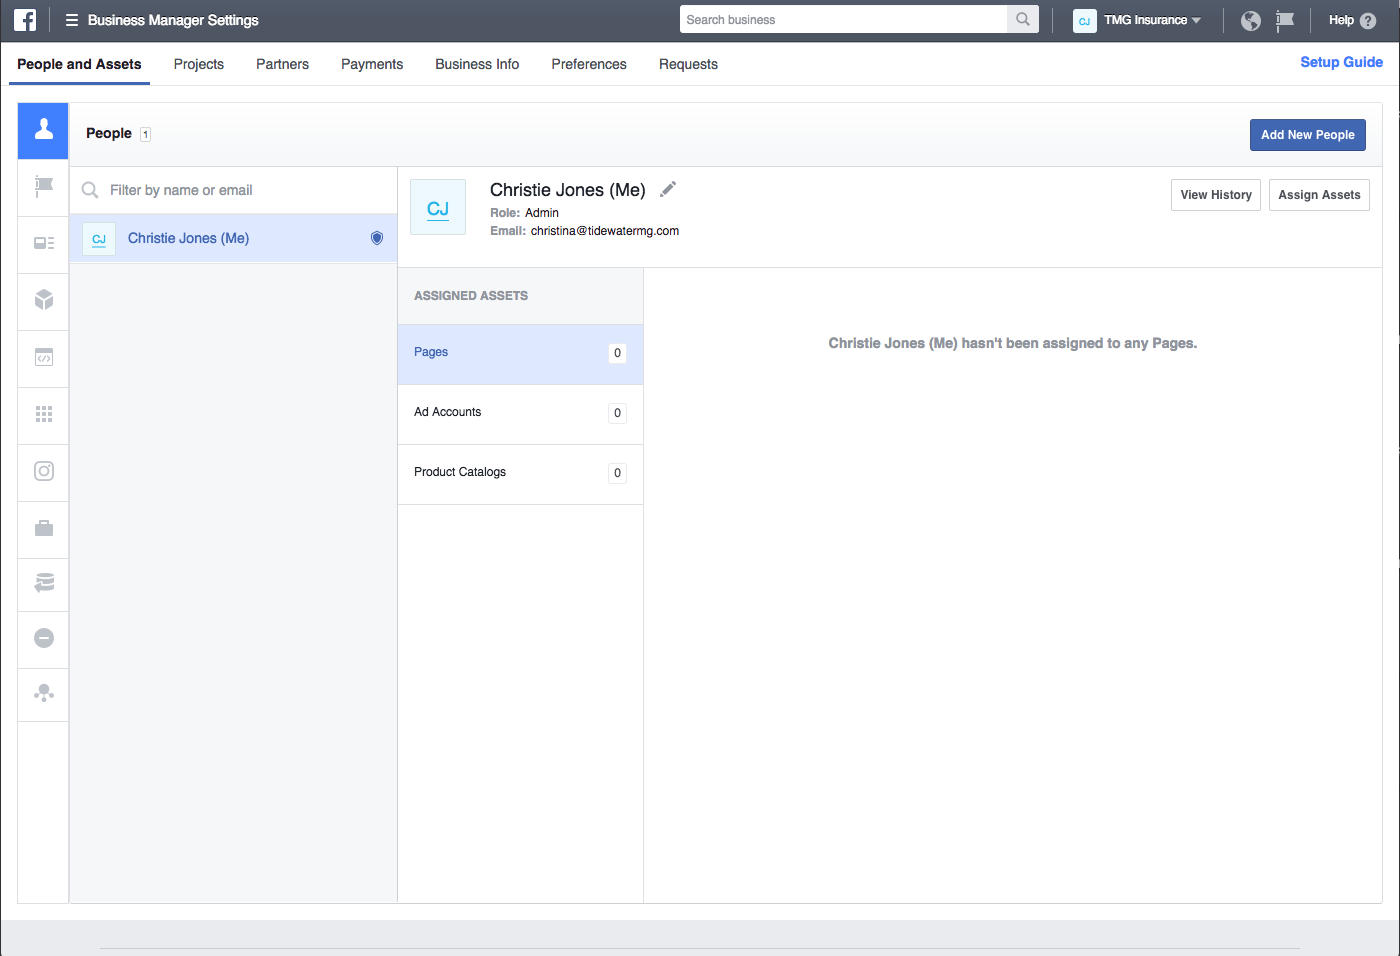
Create an Ad Account
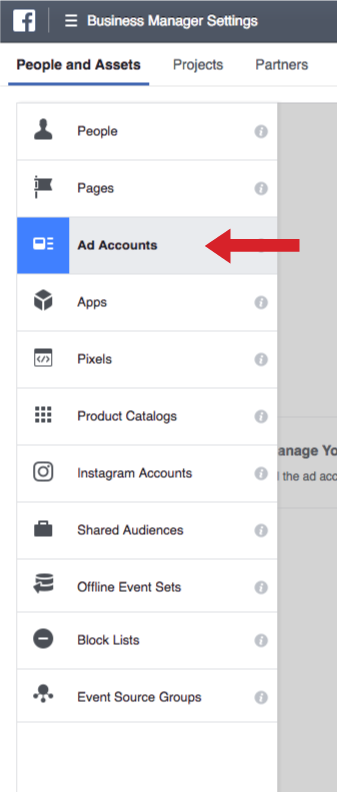
Before creating an ad, you must create an ad account. To create an ad account, open up the Business Settings and it will display the first menu item, People and Assets. Click the third option, Ad Accounts, and you will see an area to add a new ad account and manage your ad accounts.
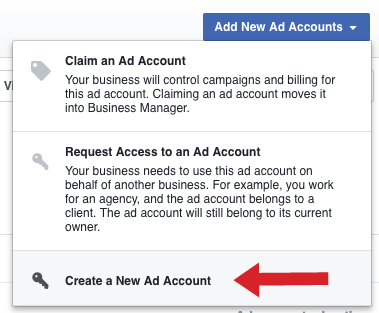
To add a new ad account, click Add New Ad Accounts in the middle of the screen. Choose the third option from the dropdown menu, Create a New Ad Account.
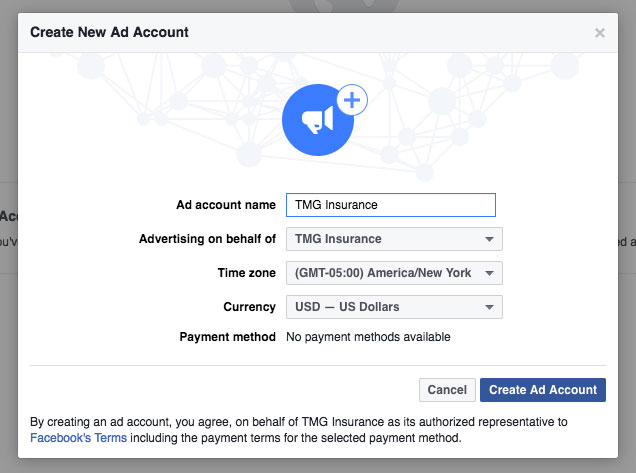
You will now be prompted to add your account name, choose which business page you will be advertising for, your time zone, currency, and the method of payment for your ads.
Create an Ad
Now that you've created an ad account, let's make your first ad!
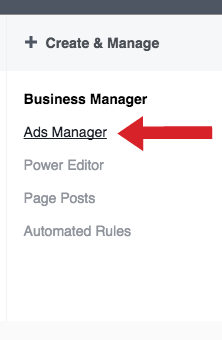
To create an ad, open the Business Manager menu at the top left of the screen, then choose Ads Manager under Create & Manage.

The Ads Manager will prompt you to choose an objective. Awareness objectives include brand awareness, local awareness, and reach. Consideration objectives include traffic, engagement, app installs, video views, and lead generation.
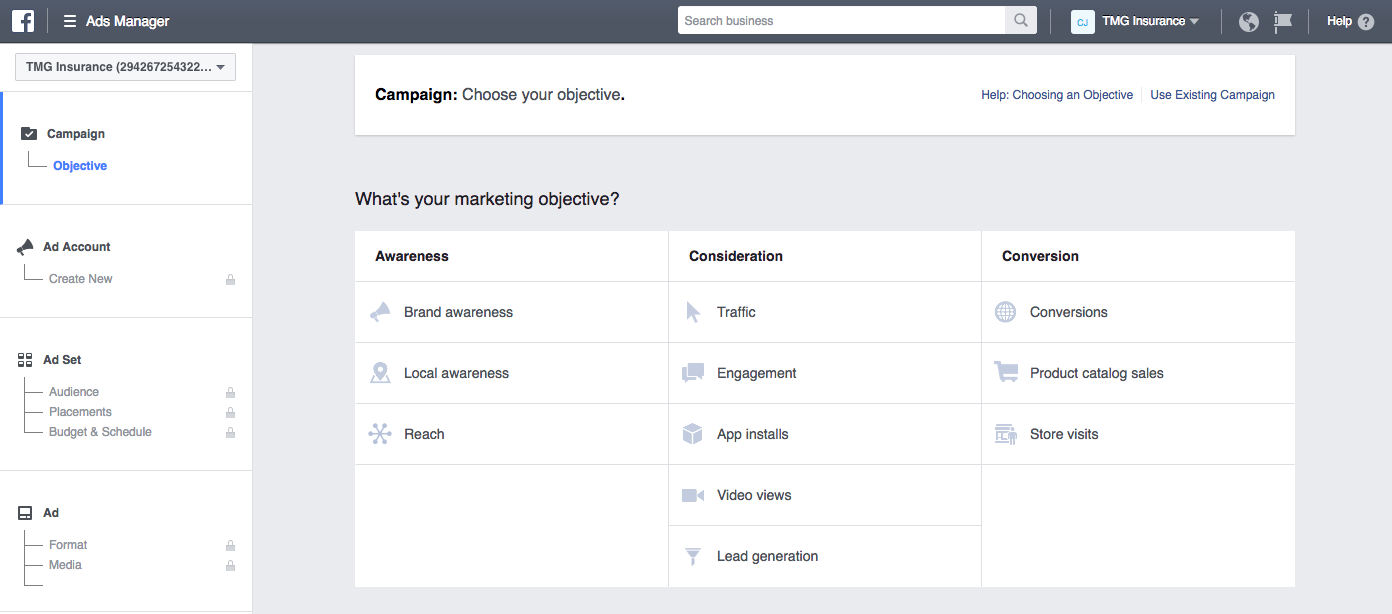
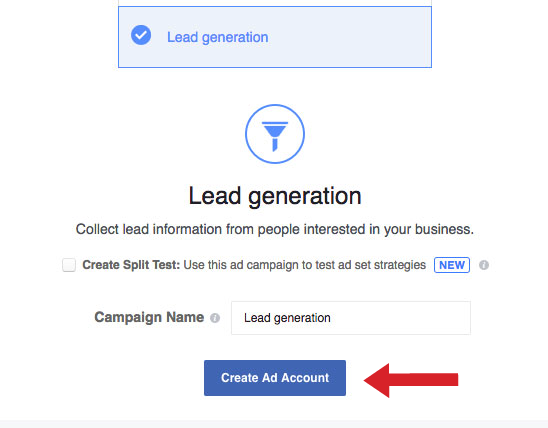
For this post we will be creating an ad with the objective of lead generation. The goal is to generate leads by acquiring contact information from potential clients. Give your campaign a name and click Create Ad Account.
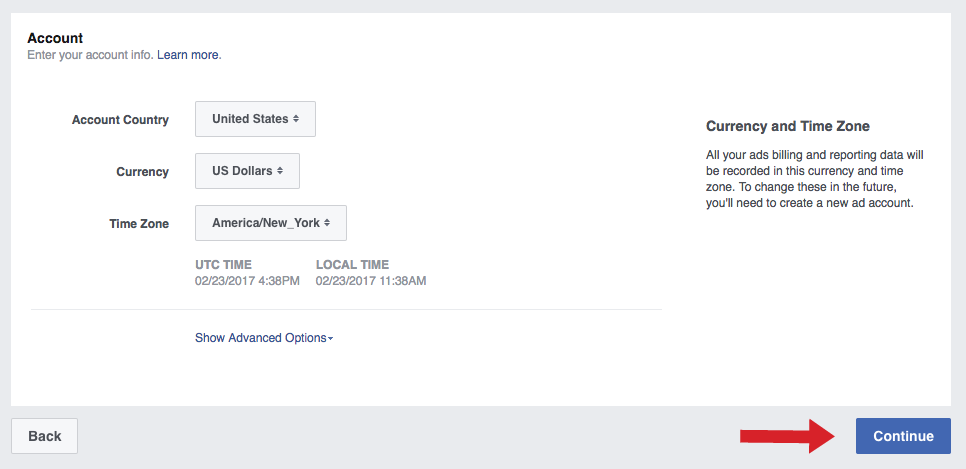
Choose your account options (country, currency, and time zone) then hit Continue.
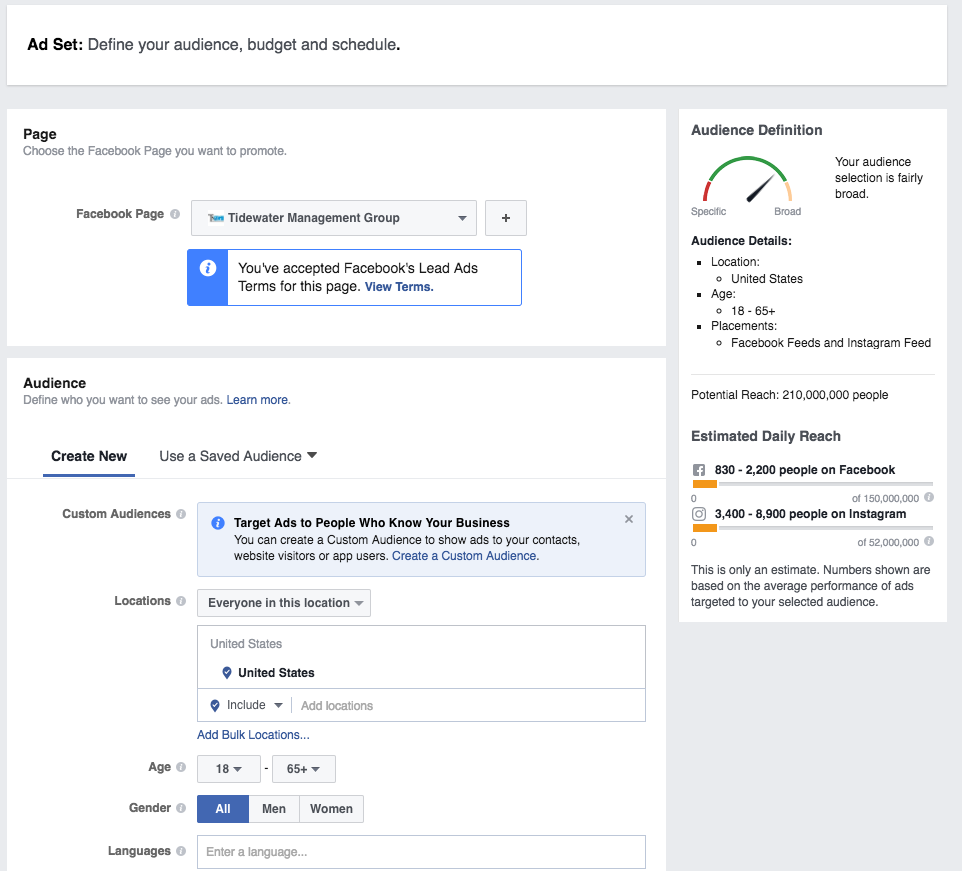
The next step is to choose the Facebook page you’d like to promote and create your audience.
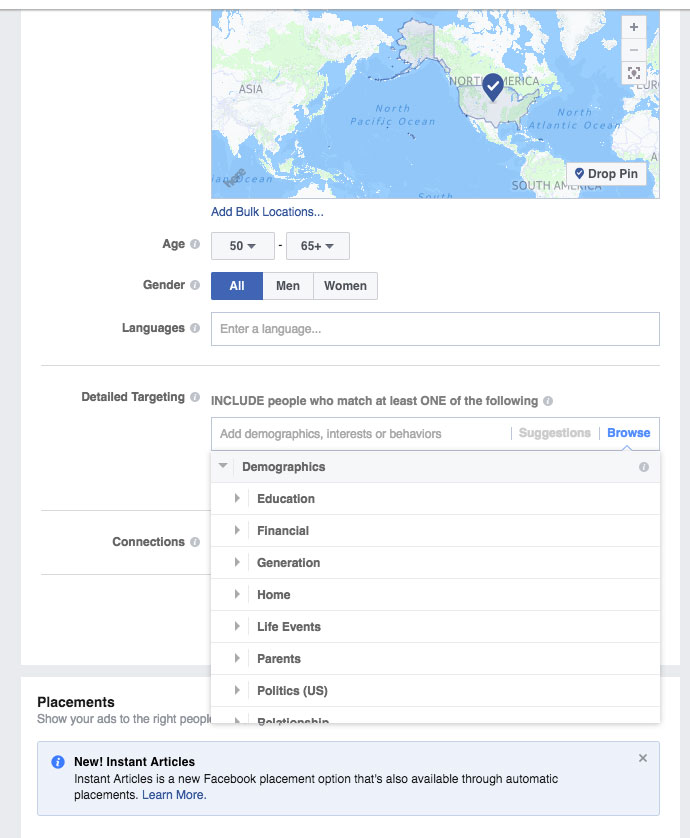
Determine the location that you would like to target (choose between the entire country all the way down to your city or region) and determine the demographics, interests, or behaviors of people you would like to target.
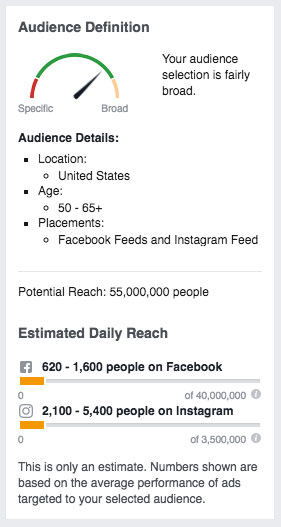
Notice that the right side of the screen displays your audience details as you choose them. A meter will display whether your audience selection is broad or specific. An estimated daily reach is projected at the bottom of this panel.
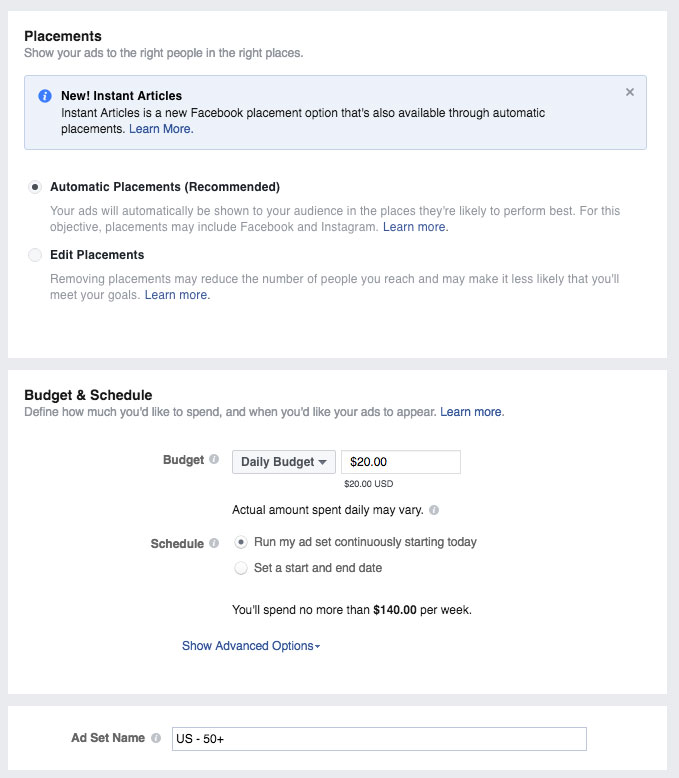
Scroll down to choose your placements, budget, and schedule. This is where you choose the amount you would like to spend on your daily budget. The amount that you spend will directly affect how many people see your ad. A high daily budget means that a larger amount of people will see your ad. The smaller the budget, the smaller the audience.
Click to continue.
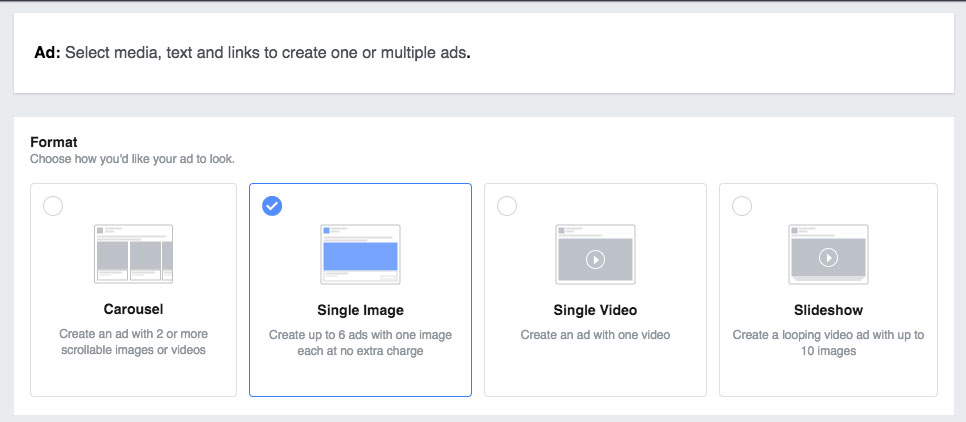
For your images, choose between:
- a carousel (with 2 or more scrollable images or videos)
- a single image
- a single video
- a slideshow format
Next you will add images from your desktop or search for stock images from Shutterstock. If you are searching for more options for stock images, check out:
- picjumbo.com (free)
- pexels.com (free)
- 123rf.com (paid)

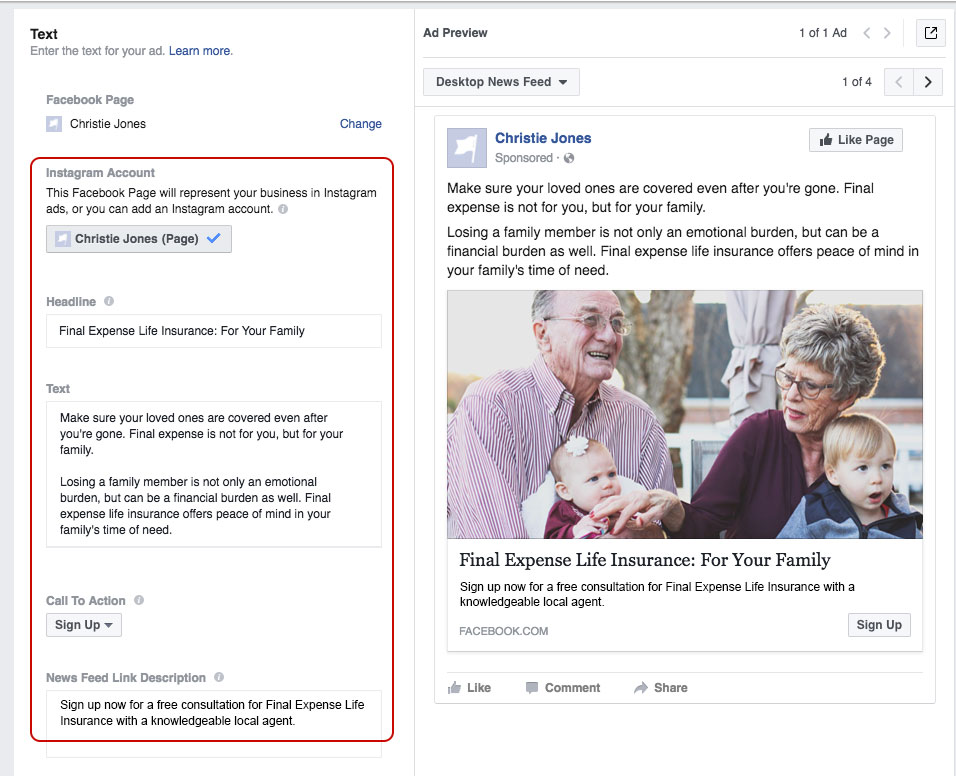
After choosing your image or images, you can add your Instagram account. Scroll down to enter the headline and text for your ad and choose your call to action (in this case I chose Sign Up) and add a News Feed link description.
Creating Your Ad’s Form
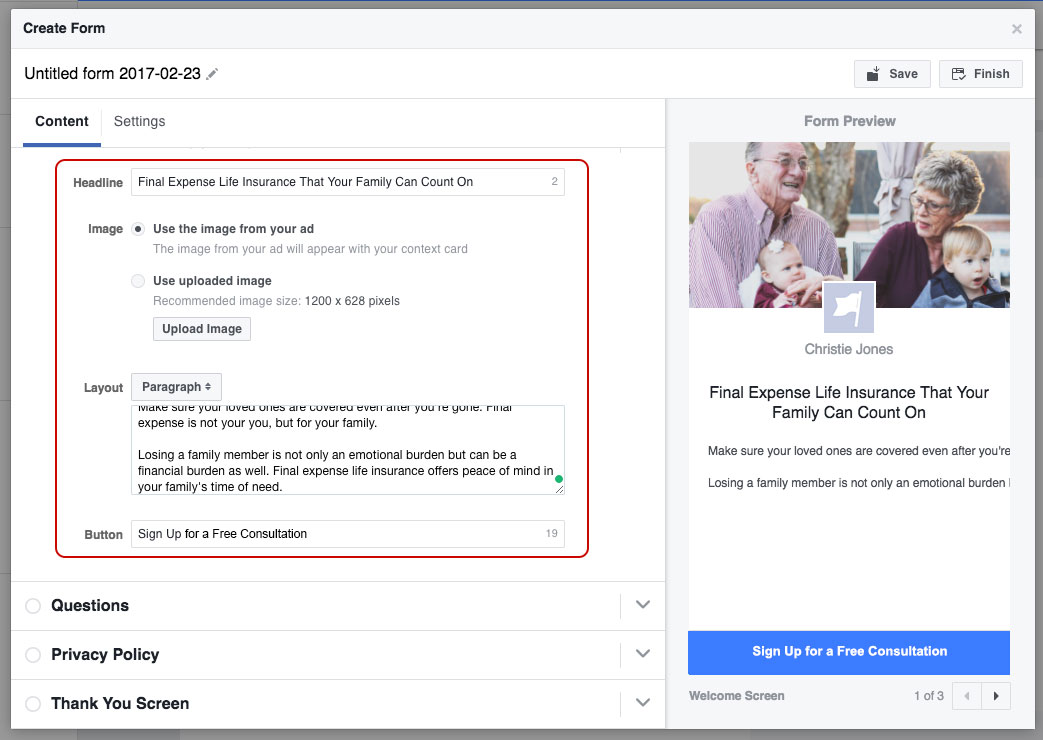
Because we chose leads generation as our objective, a form is included with this ad. Adding a form is a great way to acquire people’s contact information. Create a headline, select your image, insert your text, and decide on the text for your button.
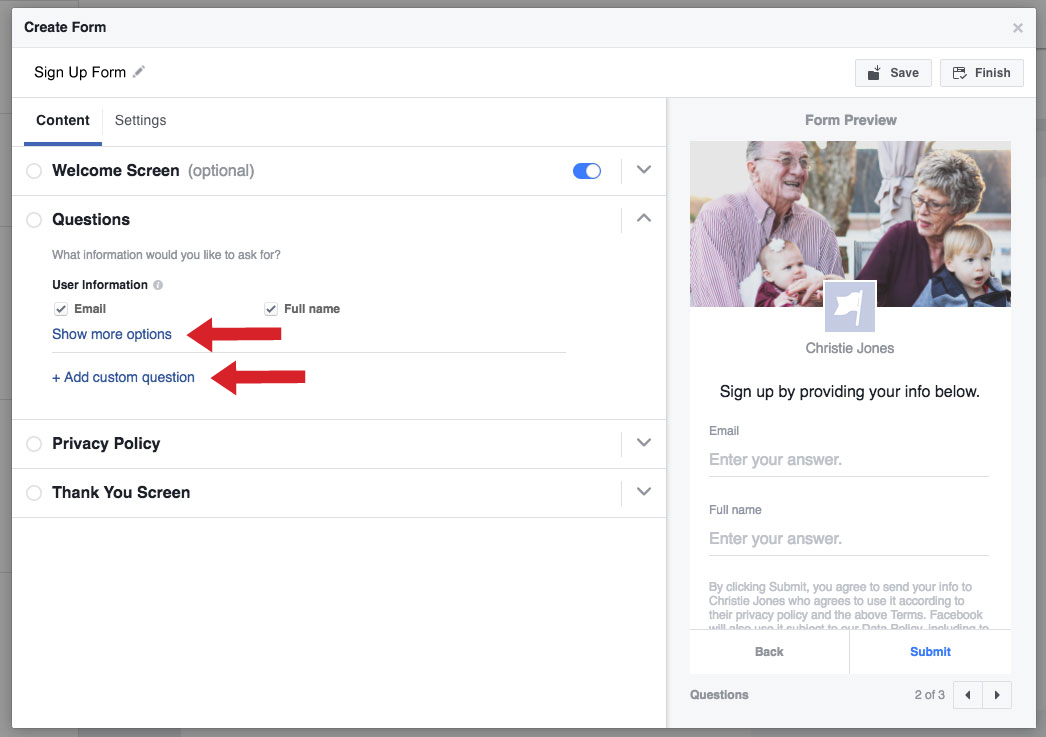
Determine what questions you would like to ask and click Show More Options to view more or create a custom question.
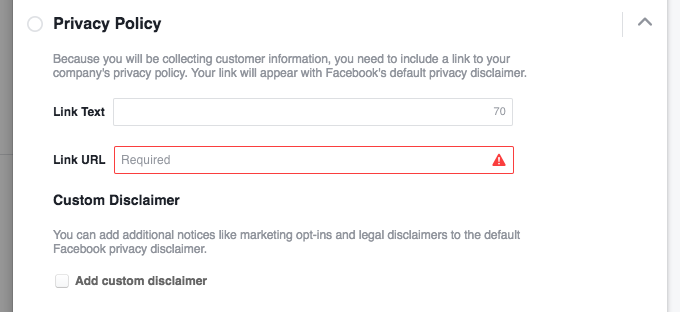
Since you will be collecting customer information, you must provide a link to your company’s privacy policy. The final step to the form is the thank you screen where you can add a link to your website. Click "finish" at the top right of the create form popup.
After completing the form information, click Process Order at the bottom right of the screen. You’re all finished with your first ad, now you will start receiving warm leads!